Winter is the ideal time of year to relax, stay inside, and work on arts and crafts. Because rock painting is easy, inexpensive, and enjoyable for all ages, it has grown in popularity as a winter pastime and offers many inspiring themes, whether you want to learn a new activity, make homemade gifts, or decorate your home. in this guide You’ll find original and simple seasonal rock painting ideas for winter, beginner advice, and necessary materials to help you to make stunning, durable artwork.
Basic Supplies for Painting Winter Rocks
Make sure you have the necessary supplies before beginning your winter rock painting projects. What you’ll need is as follows:
- Smooth rocks: Select stones that are oval, round, or flat. The best rocks are those from rivers.
- Acrylic paints: These dry quickly and offer bright, long-lasting colors.
- Paintbrushes: Use fine brushes for details and medium brushes for backgrounds.
- Metallic or glitter pens: Ideal for snow, stars, and winter patterns.
- Sealant: A clear acrylic spray or brush-on sealer protects your artwork.
- Extras: Snowy effects can be made with stencils, sponges, and texture substances.
Your graphics will remain colorful throughout the winter and beyond if you use premium paint and sealer.
Simple and Attractive Rock Painting Ideas for Winter
Winter offers many cozy and magical themes. Here are some rock paintings Ideas for winter specially beginner-friendly designs to try:
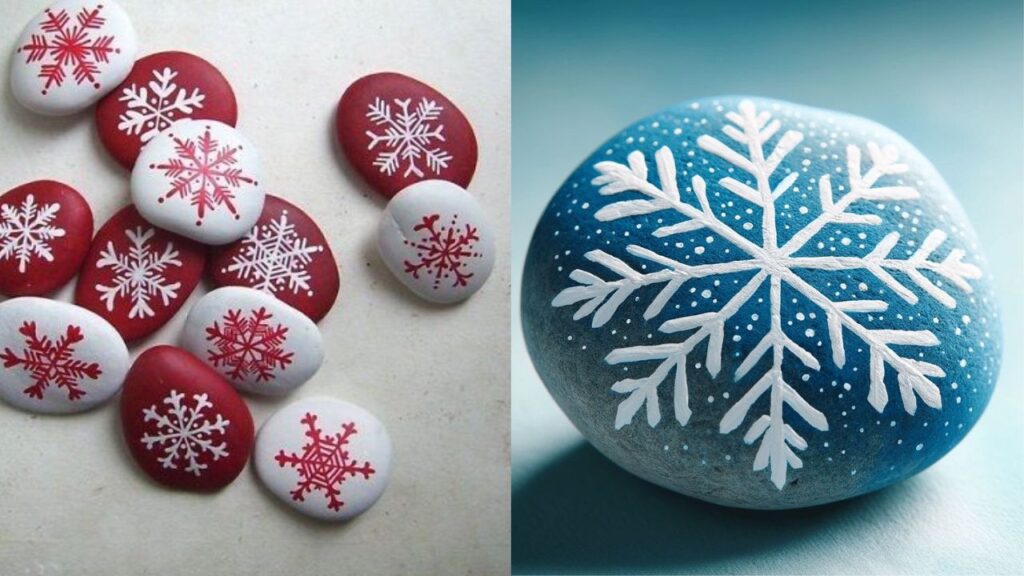
Snowflake Rock Art
A classic winter subject, snowflakes are ideal for beginner. Paint a basic white snowflake in the center of a blue or teal background. For a frosty touch, add glitter paint, small dots, or silver accents. Because each snowflake is unique, your collection will appear artistic and distinctive.
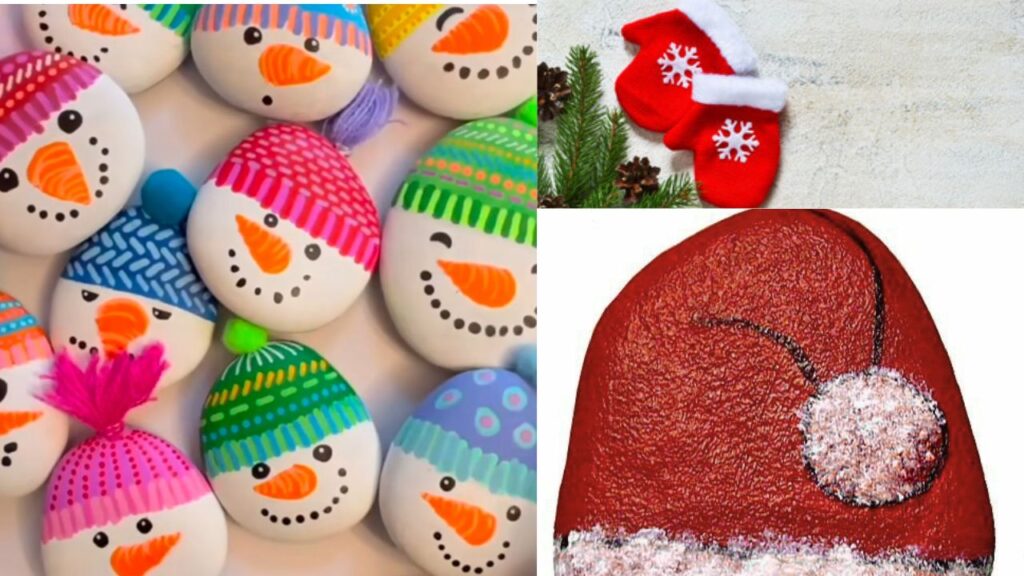
Winter Hats and Mittens
Use warm colors like red, green, yellow, or purple to create adorable hats and mitten shapes. Add eye-catching accents like tiny hearts, stripes, or polka dots. These charming patterns are simple enough for children to paint and make wonderful presents.
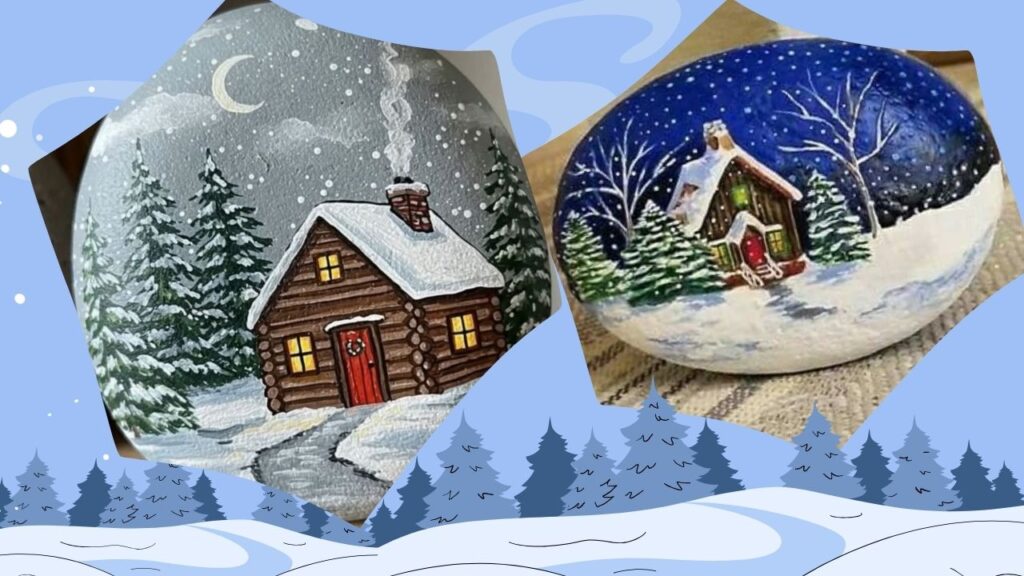
Snowy Landscape Scenes
A snowy winter scene would be more artistic. Add white mountains, pine trees, and snow falling after painting a gradient sky in shades of blue and purple. This design looks lovely as seasonal décor and evokes a serene and dreamy winter atmosphere.
Holiday and Christmas Rock Painting Ideas
Even more imaginative possibilities arise throughout the Christmas season. Try these bright rock painting ideas with a Christmas theme:
Christmas Tree Rock Art
After painting a green tree pattern on a dark background, decorate it with bright dots. Make a star on top with gold or silver paint. You can use this straightforward yet festive design to decorate your home or give gifts.

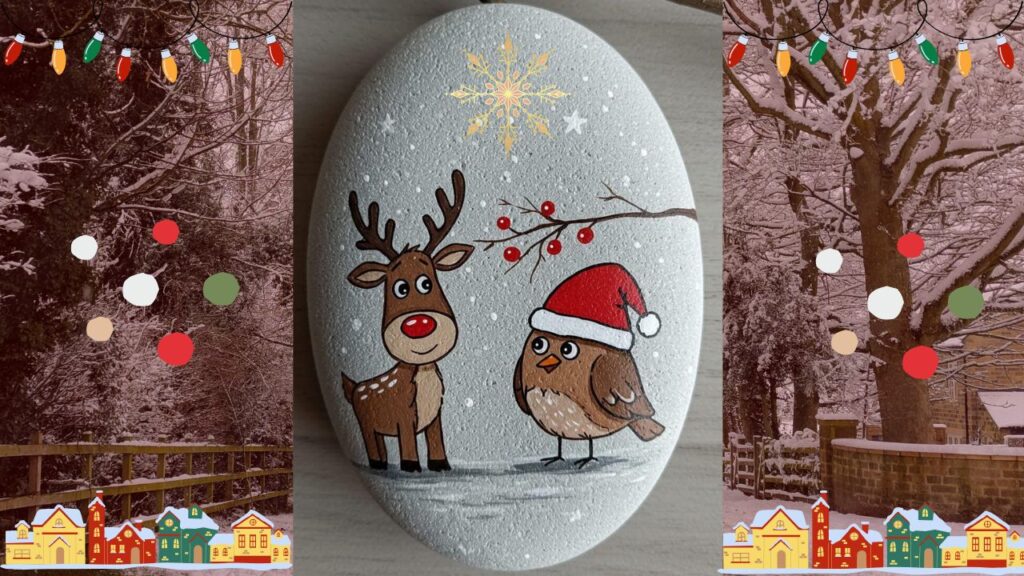
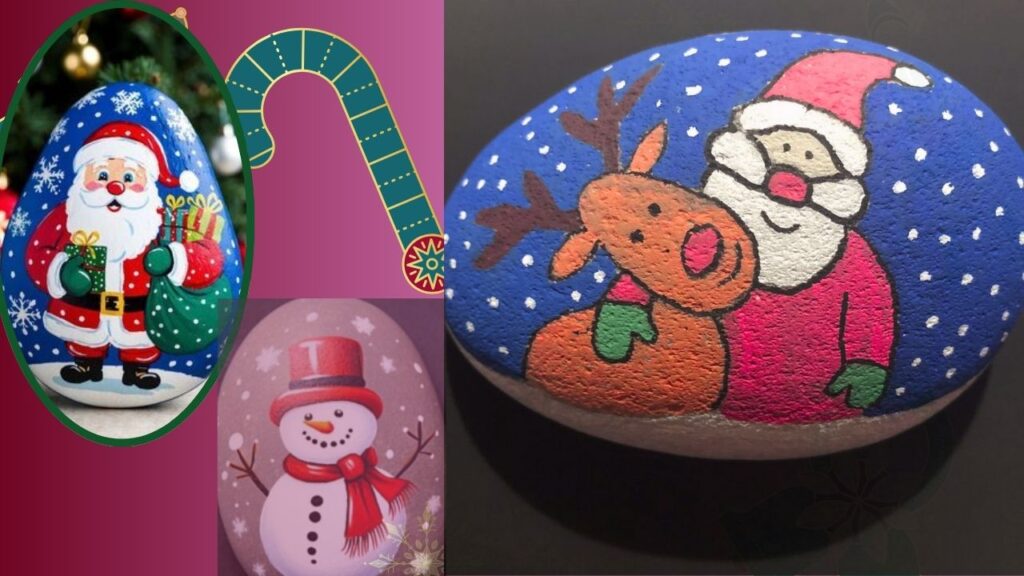
Santa, Reindeer, or Elf Faces
Holiday characters in the cartoon style are entertaining and cute. Paint circular pebbles with amiable elves, red-nosed reindeer, or adorable Santa features. Keep the characteristics basic; their eyes, smile, and hat details will suffice to identify them.
Candy Cane and Snowman Rocks
Painting candy cane stripes is simple and adds a striking splash of color. Additionally, snowman rocks are ideal for novices. Use white paint to create a carrot nose, coal eyes, and a brightly colored scarf. These patterns are perfect for winter workshops or children’s craft programs.

Inspirational Winter Quote Rocks
Decorate rocks with brief seasonal messages or winter quotations if you want to write notes. Some suggestions are:
- “Let it Snow”
- “Warm Wishes”
- “Joy”
- “Happy Holidays”
- “Winter Magic”
For accurate, clean lettering, use paint pens. Then, decorate the text with tiny stars or snowflakes. These word rocks make excellent tabletop decorations, stocking stuffers, and gift tags.
How to Use Winter Rock Art for Gifts and Décor
Your seasonal rock painting ideas for winter can be used in many creative ways:
- Table centerpieces: Arrange painted rocks in a decorative tray or bowl.
- Shelf and mantle décor: Display them alongside candles or fairy lights.
- Christmas ornaments: Tie a string around small rocks and hang them on your tree.
- Gift toppers: Add a personalized painted rock on top of wrapped gifts.
- Neighborhood kindness rocks: Leave cheerful winter-themed rocks outdoors to brighten someone’s day.
These small touches add warmth to your home during the cold season.
Effective Winter Rock Painting Tips for Beginners
If you’re new to rock painting, keep these helpful tips in mind:
- Always clean your rocks before painting.
- Paint the background first, then add details once the base coat is dry.
- Use thin layers for smooth results.
- Let each layer dry fully to avoid smudging.
- Practice your design on paper before painting the rock.
- Seal your rock after the paint dries completely to protect it from moisture.
How to Seal and Protect Your Winter Rock Art
Apply a clear sealant to keep your winter rock art appearing vibrant. You can apply a glossy finish for a sparkling appearance or a matte finish for a soft, natural look. While brush-on sealers offer you greater control, spray sealers are quick to use. Before touching or exhibiting your rock, let it dry for a full day.

Conclusion
Winter is a lovely time to enjoy easy things, warmth, and creativity. You can make beautiful artwork that makes thoughtful handcrafted gifts and brightens your house with these seasonal rock painting ideas for winters. Every painted rock gives a beautiful touch to the season, whether you choose snowflakes, festive characters, winter landscapes, or motivational sayings. So pick up your paints, locate some smooth stones, and have a warm winter full of creativity and art.